Mod's Build Log

Perforated & bubble cap plated columns

Mod's Build Log

Postby Modernity » Wed Jan 09, 2013 7:36 pm

Ok. After months sidelined due to having no access to a Oxy set, a random act of kindness came my way. So here is progress:
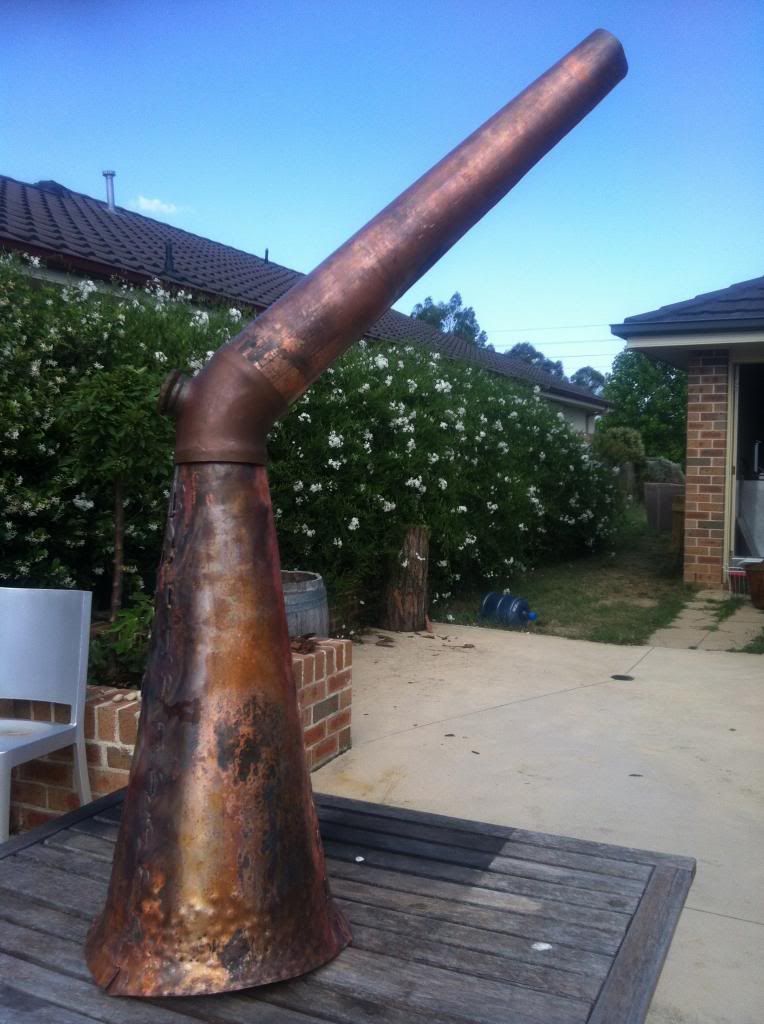
60mm tapering to 100mm at the bend, then out to 300mm. There is a lot more work to get the bell shape into the 300mm to 100mm section.
Image
Modernity
 
Posts: 183
Joined: Sun Nov 27, 2011 2:34 pm
Location: Southern Highlands, NSW
equipment: I am currently refurbishing a 150 ltr mush tun.
Currently building a 150 ltr oil heated pot still, with 8" copper column.

Re: Mod's Build Log

Postby Kimbo » Wed Jan 09, 2013 8:12 pm

Lookin good Mod, Glad you are able to continue with this build, its gonna be brilliant :handgestures-thumbupleft:
Kimbo
Lifetime Member
 
Posts: 5461
Images: 0
Joined: Fri Mar 18, 2011 6:33 pm
Location: Perf WA
equipment: 4" bubbler with a 6"inline thumper

Re: Mod's Build Log

Postby emptyglass » Wed Jan 09, 2013 8:14 pm

Good to see the game is on again.
Looking sweet as usual mod.
emptyglass
 

Belated Update

Postby Modernity » Sat Feb 23, 2013 4:51 pm

Progress is slow here.
The current task is still the tapered column tapering 300mm by 100mm. It is coming along (as in the earlier photos).

The main chore after hammering it for an hour or two is annealing the big copper section, that requires a 30 min drive to a mates workshop to use his Oxy set.I emptied the gas last time I was there (not a good look) :angry-banghead:
It is a heavy job to hold and hit with the hammer at the same time. The other slow down is it is a very noisy job that can only be done when the neighbours are not at home. One of the family said they could hear me banging the crap out of it 4 houses away! Nice :violence-smack:

I have flared out the first 50mm of the bottom end like a trumpet bell now, ready to meet the domed boiler lid (the top of the boiler is 520mm across). The remain job to making all the small dents into one smooth surface and it is a bitch of a job because of the way I stitch the copper together (one thing I would do differently next time)
I am cheating on the lid of the boiler and using a 2nd-hand round copper sink. I could cry just thinking about cutting a 300mm hole in it to fit the flared column.
There are some bloody good people on here I must say. A piece of 6" copper pipe for the man-way inspection hatch arrived in the postal a month or so back from a very very kind AD'er. Thank you to you again, SIR :handgestures-thumbupleft: Now I am working on the lid and seal for that now too. By the time I cut the 300mm centre out of the copper lid/sink and then the hole for the 6" inspection port there will bugger all left of the bloody beautiful copper sink. So best I don't cock that one up
Modernity
 
Posts: 183
Joined: Sun Nov 27, 2011 2:34 pm
Location: Southern Highlands, NSW
equipment: I am currently refurbishing a 150 ltr mush tun.
Currently building a 150 ltr oil heated pot still, with 8" copper column.

Re: Belated Update

Postby emptyglass » Sat Feb 23, 2013 8:47 pm

Modernity wrote: One of the family said they could hear me banging the crap out of it 4 houses away! Nice :violence-smack:


Damn neighbors. They just don't understand the importance of this work. ~x(
emptyglass
 

Re: Mod's Build Log

Postby Gas on » Thu Apr 11, 2013 3:17 pm

Hey Mod,
How's this build going?
Have you got an update for us? any recent pics
cheers
Gas on
 
Posts: 356
Joined: Sun Jun 19, 2011 11:51 pm
Location: perth sor
equipment: baked beans & rum

arfa 5 star bubbler

Re: Mod's Build Log

Postby DrunkASAskunk » Fri Apr 12, 2013 2:32 am

This is the first I have seen this thread Its a good read and some very nice work if I do say. How ever I am not shaw how you plan to heat the still boiler. Am I write in thinking that you are running copper pipe around your boiler??. If so I dont think this will work all that well sorry to say. I am not trying to be a spoil sport. If you want to use steam as a heat sorce you will need to convert it back to a liqued and that heats what you want to heat. I think the copper pipe around the boiler will work abit but your probly not going to get the heat you want. You will lose alot of heat. If your wondering what I mean. Take capachino maker and get a stainles milk jug with some cold milk in it tern on your machine and just driect the steam to blow on to it, and see how long it takes to heat up. Now once you have done that get some more cold milk in the jug and stick the steam in to milk and time how long it takes to heat much faster alot less steam needed. This is converting it back to a liqued.
DrunkASAskunk
 
Posts: 201
Joined: Sun Mar 03, 2013 3:27 am
Location: the moon
equipment: what i the diff

Re: Mod's Build Log

Postby DrunkASAskunk » Fri Apr 12, 2013 2:44 am

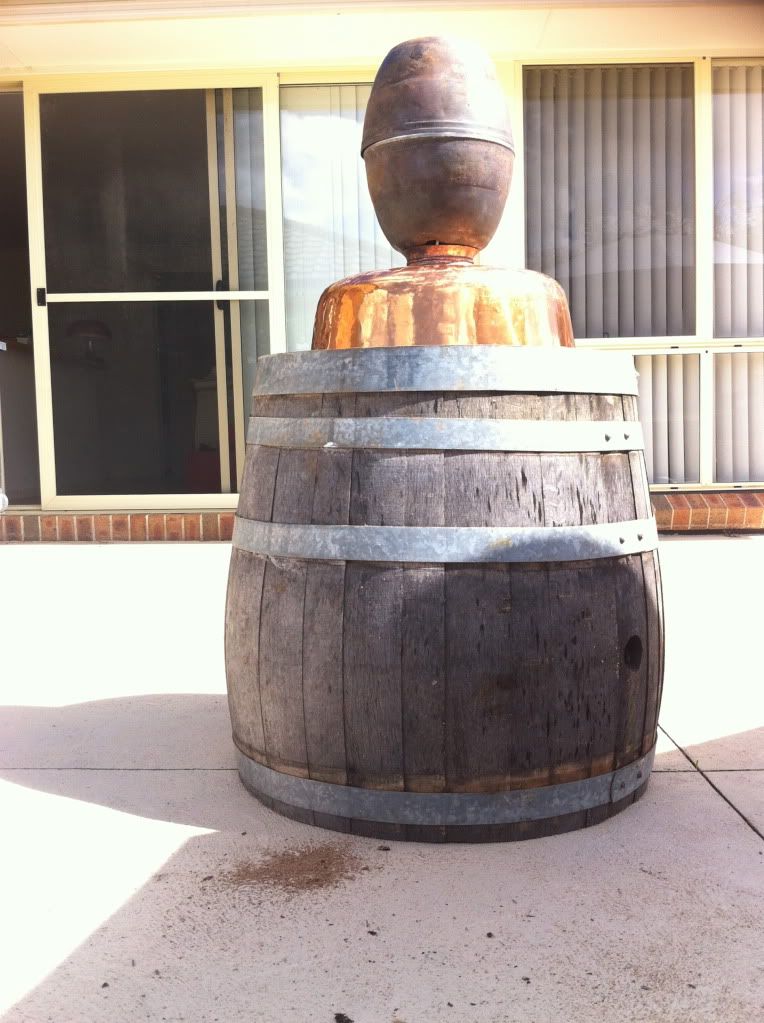
Modernity wrote:Ruft out the outside casing design for the boiler this week. I have decided to insulate the bottom half of the boiler with urethane spray foam after I have soldered the 3/8 copper heating pipe to the outside of the boiler. The next problem was how was I going to clad it all? I started to look at my options and a oak barrel got roped into the deal. So what do you all think? a good sand and a few coats of vanish...
Image


Ok i must have missed this I dont think it will work the way you intend it to. I think you will be better of with your still boiler sitting in a pot that has water in it with steam going in to that. :-B
Any one els under stand what I am saying ??
DrunkASAskunk
 
Posts: 201
Joined: Sun Mar 03, 2013 3:27 am
Location: the moon
equipment: what i the diff

Re: Mod's Build Log

Postby googe » Fri Apr 12, 2013 8:15 am

Bottom of page 3 he has internal heating tube. That steam will heat it up faster than...umm something fast.
googe
 

Previous

Return to Plated Column Stills


Who is online

Users browsing this forum: No registered users and 108 guests

x