Small bubble cap plates
hi guys and girls :)
as far as i can tell, i haven't seen any small bubble cap plate builds. I decided to take this on. i must have been planning this for a couple of years and forgotten about it. i discovered i had all the necessary tube and 6 flat pieces of 0.8mm plate a bit bigger than a plate already cut :o .
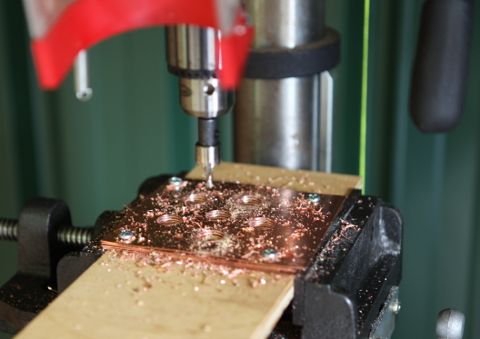
first step was to screw the 6 pieces of plates to some plywood and drill the centre hole and 5 outer holes with a 16mm hole saw:
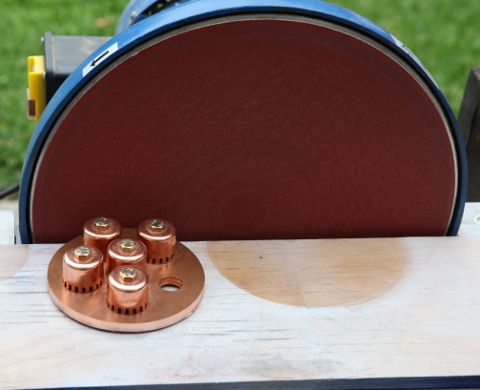
the bulk of the excess was trimmed with a cut off wheel on the angle grinder, then finished off on a disk sander:
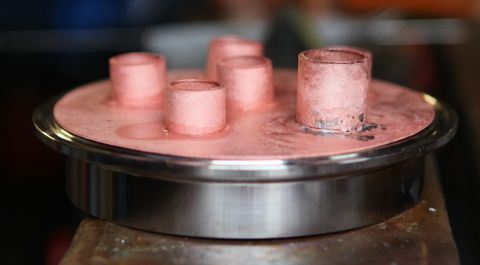
next i used a pipe cutter to cut 30 lengths of 16mm tube for the risers:
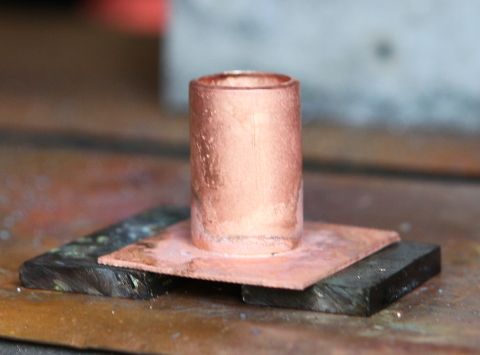
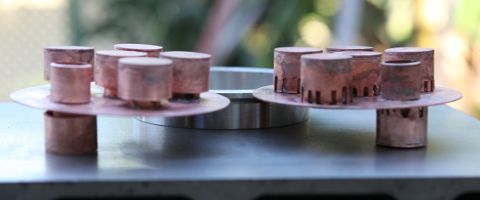
the aria around the hole on the plate was cleaned up with a stainless wire wheel on the dremmel and supported the riser with some metal plate to get the height right:
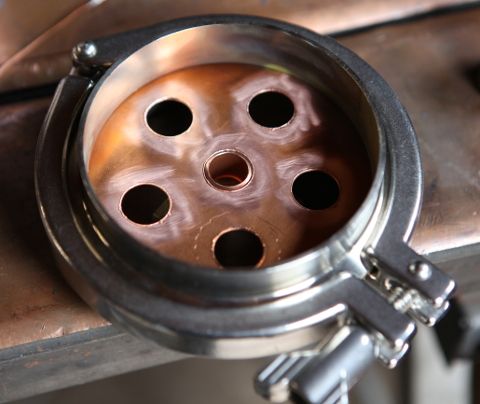
and then welded:
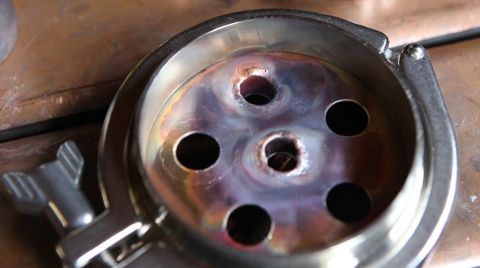
when i was making my boiler i had brazed some copper plate to a hammer face and a dolly. it was then that i discovered that it was not difficult to get copper to melt with the tig if you got an edge. welding was tricky because once the puddle forms it's very easy on the plate for the tig torch to become a plasma cutter :scared-eek: . i wrecked one plate, so this became my guinea pig plate. i discovered i had some solid core copper wire, so this became handy for fixing things when they started to get out of hand. on the guinea pig plate i tried to silver braze a couple of risers with 2% and 5% with MAPP gas, but something was acting as a heat sink and I just couldn't get it to flow.
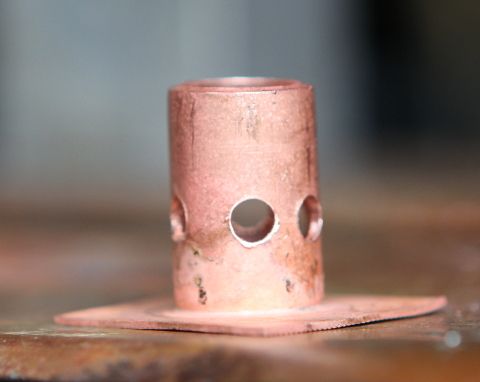
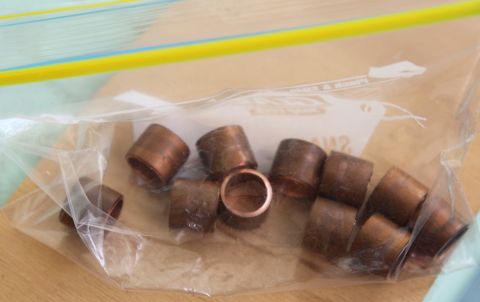
next was starting to make the caps. i started with some copper sheet and 1in tube cut to length:
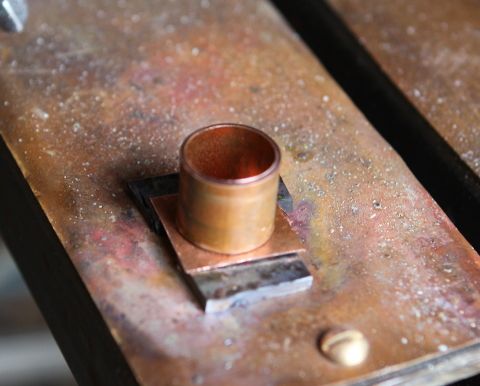
brazed from the inside with 2% silver:
and soaked it in vinegar :
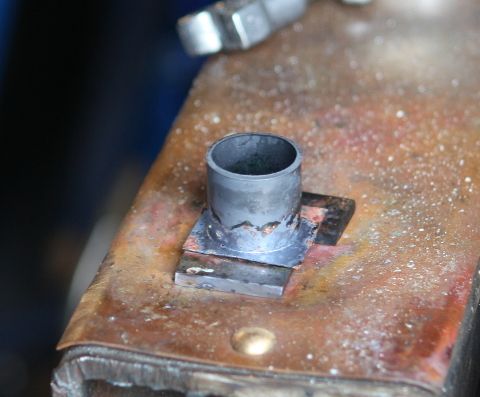
this is how it came out:
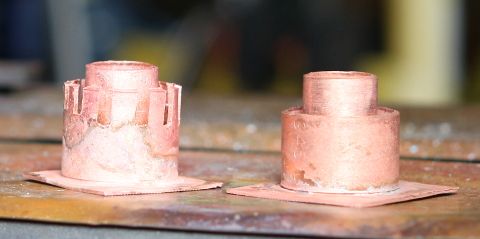
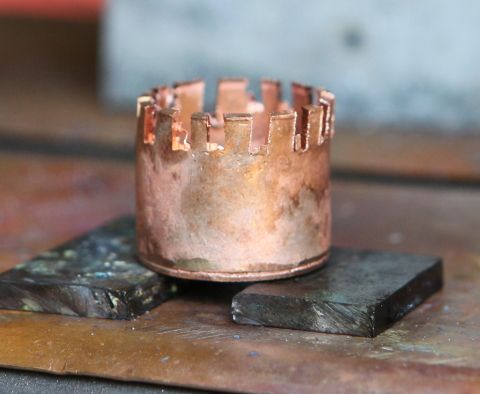
not exactly pretty, but later after I did the slots they were soaked in citric acid and that cleaned them right up :-D . for S&G i decided to try welding one cap:
a habit i picked up from building a canoe, i made a jig to cut the slots. 6 caps at a time, two slots per cut with a circular saw :

sadly i'd quenched the caps after they were brazed, so the copper was annealed.this bit me in the bum during the cutting:
it was pretty tedious having to pull the 6 out after each cut, re-shape the cap with a pair of mig pliers, put it back into the jag turned a bit and on with the next cut. the finished cap after a soak in citric:
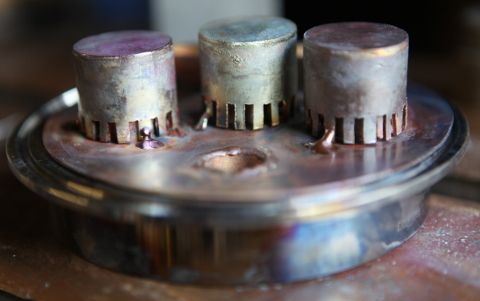
the weir for the down comer was brazed on :
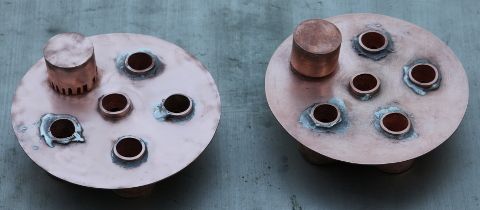
and i used 15% silver braze and the tig to secure the caps to the plate:
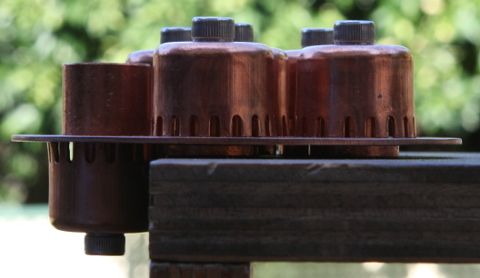
the finished plate :whistle: :
:laughing-rolling:
while I was cutting the slots i had an idea, which will be in the next post .
as far as i can tell, i haven't seen any small bubble cap plate builds. I decided to take this on. i must have been planning this for a couple of years and forgotten about it. i discovered i had all the necessary tube and 6 flat pieces of 0.8mm plate a bit bigger than a plate already cut :o .
first step was to screw the 6 pieces of plates to some plywood and drill the centre hole and 5 outer holes with a 16mm hole saw:
the bulk of the excess was trimmed with a cut off wheel on the angle grinder, then finished off on a disk sander:
next i used a pipe cutter to cut 30 lengths of 16mm tube for the risers:
the aria around the hole on the plate was cleaned up with a stainless wire wheel on the dremmel and supported the riser with some metal plate to get the height right:
and then welded:
when i was making my boiler i had brazed some copper plate to a hammer face and a dolly. it was then that i discovered that it was not difficult to get copper to melt with the tig if you got an edge. welding was tricky because once the puddle forms it's very easy on the plate for the tig torch to become a plasma cutter :scared-eek: . i wrecked one plate, so this became my guinea pig plate. i discovered i had some solid core copper wire, so this became handy for fixing things when they started to get out of hand. on the guinea pig plate i tried to silver braze a couple of risers with 2% and 5% with MAPP gas, but something was acting as a heat sink and I just couldn't get it to flow.
next was starting to make the caps. i started with some copper sheet and 1in tube cut to length:
brazed from the inside with 2% silver:
and soaked it in vinegar :
this is how it came out:
not exactly pretty, but later after I did the slots they were soaked in citric acid and that cleaned them right up :-D . for S&G i decided to try welding one cap:
a habit i picked up from building a canoe, i made a jig to cut the slots. 6 caps at a time, two slots per cut with a circular saw :
sadly i'd quenched the caps after they were brazed, so the copper was annealed.this bit me in the bum during the cutting:
it was pretty tedious having to pull the 6 out after each cut, re-shape the cap with a pair of mig pliers, put it back into the jag turned a bit and on with the next cut. the finished cap after a soak in citric:
the weir for the down comer was brazed on :
and i used 15% silver braze and the tig to secure the caps to the plate:
the finished plate :whistle: :
:laughing-rolling:
while I was cutting the slots i had an idea, which will be in the next post .