
 5 Star Store
 Community Guidelines
 Newbies Corner
 Recipes
 AD search
Hey guys and girls
I've been talking myself into it and out of it for weeks, do i build it, do i just buy one? I've finally thought to me self... f*ck it and just do it ya whinging prick. Not that a bubbler build is simple but i'm looking at keeping this bad boy into 1 piece maybe even 2. Something real similar to SBB's/Linny build :handgestures-thumbupleft: Everyone seems to be going modular and not the old school plate tree, can i even call a bubbler old school as they've only been running around in the hobby world for the last 2 or so years? :laughing-rolling:
I'm always crying about my work space but i'm sure i'm not the only bloke out there who doesn't have much workspace or even a work bench :laughing-rolling: but i'm giving it a go anyway :handgestures-thumbupleft:
Tomorrow i'm picking up some 4" and 2" from a mate. Pick up some new tools over the weekend and hopefully get this bad boy started over the weekend! Oh and hopefully this weather doesn't stuff me around to much, bloody took me an hour to get me boiler charge upto temp the other day when it only usually takes 1/2 hr :laughing-rolling:
This is the general gist of the build
4 inch bubbler
4 plate, plate tree. 3/4 inch down comers with i'm hoping 1" end caps
4" deflag with 4 x 1" pipes - i was thinking of going drop in but not 100% sure on how to do this.
2" shot gun with 5 x 1/2" pipes
Let the fun begin! :handgestures-thumbupleft:
The simple 4" bubbler
19 posts
• Page 1 of 1
Re: The simple 4" bubbler
![]() by bluess57 » Wed Jun 12, 2013 8:31 pm
by bluess57 » Wed Jun 12, 2013 8:31 pm
Good luck with the build.
I built mine on the back deck/ in the back yard using minimal tools and a pair
of saw horses as bench and the BBQ as soldering station.
I used 3/4 pipes inside the dephlegmator as its one less pipe sizing you need to get.
Just use 4x 1/2 for the condensor
Cheers
I built mine on the back deck/ in the back yard using minimal tools and a pair
of saw horses as bench and the BBQ as soldering station.
I used 3/4 pipes inside the dephlegmator as its one less pipe sizing you need to get.
Just use 4x 1/2 for the condensor
Cheers
- bluess57
- Posts: 473
- Joined: Fri Aug 10, 2012 7:28 pm
- Location: ACT
- equipment: keg boiler - 4" copper bubbler
Re: The simple 4" bubbler
![]() by bt1 » Wed Jun 12, 2013 8:55 pm
by bt1 » Wed Jun 12, 2013 8:55 pm
Go glass...
simple, quick, modular, far cheaper, good results, can see what's happening or about to happen.
less tools, less effort. Looks sexy too.
bt1
simple, quick, modular, far cheaper, good results, can see what's happening or about to happen.
less tools, less effort. Looks sexy too.
bt1
- bt1
- Posts: 2448
- Joined: Sun Apr 22, 2012 11:56 am
- Location: Adelaide
- equipment: 2 x Glass Bubblers, 5 plate 89mm & 6 plate 110mm
4" 6 plate copper bubbler, 500mm copper packed section
Several pots, custom boiler
14 keg rotating brew setup, fermentation & dispenser fridges.
Re: The simple 4" bubbler
![]() by Linny » Wed Jun 12, 2013 9:00 pm
by Linny » Wed Jun 12, 2013 9:00 pm
even though i have more than 4 plates now ,,, it never gets used LOL ... you cant go wrong with the 4"... start to finish i can do a 30L run in 3 Hrs. I used 3/4 as well since it was easier to get from bunnings , but if its available then why not ? One thing i noticed on mine that i would love to change is the distance between the PC ( shotgun ) and the main column, i was too focused on setting a SS plate on the keg that when i did run it as a pot , it didnt quite fit and everytime i use it i have to use a empty rock basket as a spacer .... just food for thought
- Linny
- Posts: 1147
- Joined: Thu Oct 11, 2012 8:46 pm
- Location: Newcastle NSW
- equipment: 4 Plate 3" Glass Bubbler - 50L Boiler
50L BIAB Temp Controlled Mash Tun
3" Carter Head Soon to Come
Re: The simple 4" bubbler
![]() by tickle » Wed Jun 12, 2013 10:50 pm
by tickle » Wed Jun 12, 2013 10:50 pm
Its a great plan. Start on it!
You dont need much in the way of tools, pipe cutter, snips, good torch, and a drill and some clamps. Things I think most guys should have anyway! I use a grinder as well and bought a cheapo drill press. As far as modular goes, its a personal choice. Ive gotton away from it, make 4 or 5 plates, attach the reflux condensor via easy flanges. If you want to add a packed section, or more plates, or both, make the section with more ez flanges and away you go. Less sash spent on clamps and less potential leaks. Either works though!
You dont need much in the way of tools, pipe cutter, snips, good torch, and a drill and some clamps. Things I think most guys should have anyway! I use a grinder as well and bought a cheapo drill press. As far as modular goes, its a personal choice. Ive gotton away from it, make 4 or 5 plates, attach the reflux condensor via easy flanges. If you want to add a packed section, or more plates, or both, make the section with more ez flanges and away you go. Less sash spent on clamps and less potential leaks. Either works though!
- tickle
- Posts: 201
- Joined: Sat Jul 28, 2012 1:11 am
- Location: Boston,Ma, usa
- equipment: 4" 4 plated bubble cap,
Re: The simple 4" bubbler
![]() by Bushy » Thu Jun 13, 2013 7:31 am
by Bushy » Thu Jun 13, 2013 7:31 am
Onya Jonno,
Another build on the way. Every one has a different set of circumstance under which they build a still. The important bit is the still gets made.
Gas makes his on a glass outdoor table and he makes some amazing stuff.
Another build on the way. Every one has a different set of circumstance under which they build a still. The important bit is the still gets made.
Gas makes his on a glass outdoor table and he makes some amazing stuff.
- Bushy
- Posts: 1003
- Images: 0
- Joined: Sun Jun 17, 2012 8:25 am
- Location: Crabland, West Australia
- equipment: 50l keg boiler with 5Star 3600 watt element
4 inch plated column. 4 perf plates.
Lava Rock Behemoth
Re: The simple 4" bubbler
![]() by Jonno » Thu Jun 13, 2013 6:22 pm
by Jonno » Thu Jun 13, 2013 6:22 pm
Bushy wrote:Onya Jonno,
Another build on the way. Every one has a different set of circumstance under which they build a still. The important bit is the still gets made.
Gas makes his on a glass outdoor table and he makes some amazing stuff.
Gas got some skill, how the f... did he manage to build shit on his glass table without smashing it :laughing-rolling:
Anyway, a little update. Picked up me copper pieces from me mate today. He goes to the scrappies abit and picks up stuff and start banging on it and atleast i've got a little headstart :laughing-rolling:

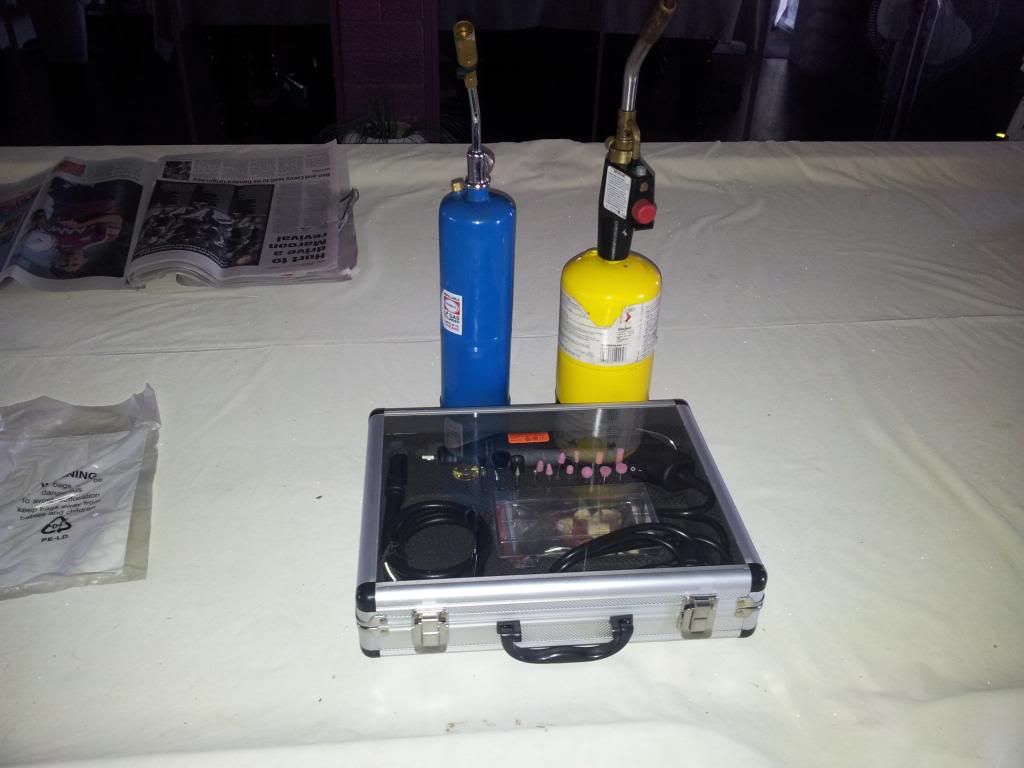
Pickup a few more bits and pieces tomorrow, refill me lil propane bottle, pick up a new mapp gas bottle and im away :handgestures-thumbupleft: Hopefully the misses doesn't get to much in me way over the w/e.
Oh and quick question for all you brainy blokes out there, what should i use for the hard solder/brazing whatever the hell you call it
Cheers lads!
- Jonno
Re: The simple 4" bubbler
![]() by Yummyrum » Thu Jun 13, 2013 6:30 pm
by Yummyrum » Thu Jun 13, 2013 6:30 pm
Go jonno go go go :handgestures-thumbupleft:
Lawns look like they don't need mowing.Have a great weekend .Thats some nice copper you got there .We all need mates like yours :happy-partydance:
Lawns look like they don't need mowing.Have a great weekend .Thats some nice copper you got there .We all need mates like yours :happy-partydance:
- Yummyrum
- Posts: 1897
- Joined: Fri Dec 28, 2012 3:19 pm
- Location: Near Coffs
- equipment: Did use Still Spirits Reflux
Now use 50l Keg with Pot head for Rum and Neutral stripping runs on gas .
LM/VM head with 1m packed 2" on Still Spirits boiler for Neutrals.
Re: The simple 4" bubbler
![]() by Jonno » Thu Jun 13, 2013 6:33 pm
by Jonno » Thu Jun 13, 2013 6:33 pm
If it keeps raining I won't be doing the lawns :angry-banghead: I haven't been doing enough stripping runs for backset for weed killer :laughing-rolling:
- Jonno
Re: The simple 4" bubbler
![]() by SBB » Thu Jun 13, 2013 7:21 pm
by SBB » Thu Jun 13, 2013 7:21 pm
Jonno if I had my time again I wouldn't bother with the drop in deflag, easier to just make it four inch and bung it on top of the plated section using a couple of collars or flanges and triclamps. Personally Id go semi modular but keep it basically old school. By that I mean, one section of four inch with the plate tree, the deflag as another part, product condenser and associated bits n pieces as another part, You never know when , or if you might want to add something like a packed section for neutral at a later date. Having said that Im still more than happy with my old girl and what it produces, I wont be changing it in any way now or in the future, she is what she is, an old school bubbler.
- SBB
- Lifetime Member
- Posts: 2450
- Joined: Mon Mar 21, 2011 8:12 pm
- Location: Northern NSW
- equipment: (The Pelican) a 2 inch pot / stripper on 25L electric boiler interchangable with T500 reflux still...... 2 1/2 inch pot still on 50L keg (gas burner).....
3 inch Boka (half share with Draino),...... 4 inch 4 plate perforated plate Bubbler
Re: The simple 4" bubbler
![]() by SBB » Thu Jun 13, 2013 7:43 pm
by SBB » Thu Jun 13, 2013 7:43 pm
A few hints, Things I kinda learned the hard way, I see a few people having problems with these things with leakage past the plates n stuff, take the time to get your plate material nice n flat if you cut it from pipe, helps to anneal it before flattening in my opinion. I got mine roughly flat, annealed them, then dropped a heavy flat BBQ plate on them while they sat on another hard flat surface, worked a treat.
Also try n get your plates a nice tight fit, once you get them down nearly to size its very easy to take to much off, I used wet n dry to remove the last few thousandths of an inch.
In short I think a lot of problems people have with perf plates is due to them being less than a close to perfect fit in the column. A few thou probably doesn't matter but more could be problematic.
Drill the plates separately not all four at once and you will save a lot of drill bits, I just used a normal hand drill, a drill press aint necessarily.
- SBB
- Lifetime Member
- Posts: 2450
- Joined: Mon Mar 21, 2011 8:12 pm
- Location: Northern NSW
- equipment: (The Pelican) a 2 inch pot / stripper on 25L electric boiler interchangable with T500 reflux still...... 2 1/2 inch pot still on 50L keg (gas burner).....
3 inch Boka (half share with Draino),...... 4 inch 4 plate perforated plate Bubbler
The simple 4" bubbler
![]() by Dominator » Thu Jun 13, 2013 7:47 pm
by Dominator » Thu Jun 13, 2013 7:47 pm
Jonno wrote:Oh and quick question for all you brainy blokes out there, what should i use for the hard solder/brazing whatever the hell you call it.
5% silver solder will work sweet. Up to 3/4" (maybe 1") you will be able to do with mapp gas and turbo torch anything bigger an you will need oxy/acetylene.
- Dominator
- Posts: 1103
- Joined: Fri Apr 26, 2013 10:45 am
- Location: Sunshine Coast QLD
- equipment: 2" Pot Still/Hybrid
4" Perf Plate Bubbler
50L Keg boiler with 2 x 2400w elements
Re: The simple 4" bubbler
![]() by Jonno » Thu Jun 13, 2013 7:55 pm
by Jonno » Thu Jun 13, 2013 7:55 pm
I'm thinking what I'll do is have a to connection between the plate tree and keep the RC and PC together. My plate tree will be modular as in tri clamp connections on both ends.
- Jonno
- SBB
- Lifetime Member
- Posts: 2450
- Joined: Mon Mar 21, 2011 8:12 pm
- Location: Northern NSW
- equipment: (The Pelican) a 2 inch pot / stripper on 25L electric boiler interchangable with T500 reflux still...... 2 1/2 inch pot still on 50L keg (gas burner).....
3 inch Boka (half share with Draino),...... 4 inch 4 plate perforated plate Bubbler
Re: The simple 4" bubbler
![]() by Jonno » Sat Jun 15, 2013 11:59 am
by Jonno » Sat Jun 15, 2013 11:59 am
Picked up some bits and pieces this morning and will get a start on her tomorrow after i've done my fatherly duties for today. Tomorrow is all me baby! :handgestures-thumbupleft: I'm thinking i'll start on the rc and pc and get those outta the way. and cut up the plates for the plate tree. Lets see how we go ey :handgestures-thumbupleft:

- Jonno
Re: The simple 4" bubbler
![]() by bt1 » Sun Jun 16, 2013 8:02 am
by bt1 » Sun Jun 16, 2013 8:02 am
Nice jonno,
if you find with the PC and RC and your using silver solder, may just need some extra heat for the larger stuff...gas burner ring, barbie burner etc well helps.
Sit your work on the burner and cook it up for 5 then into it with the MAPP gun.
Look forward to seeing how you go champ.
cheers
bt1
if you find with the PC and RC and your using silver solder, may just need some extra heat for the larger stuff...gas burner ring, barbie burner etc well helps.
Sit your work on the burner and cook it up for 5 then into it with the MAPP gun.
Look forward to seeing how you go champ.
cheers
bt1
- bt1
- Posts: 2448
- Joined: Sun Apr 22, 2012 11:56 am
- Location: Adelaide
- equipment: 2 x Glass Bubblers, 5 plate 89mm & 6 plate 110mm
4" 6 plate copper bubbler, 500mm copper packed section
Several pots, custom boiler
14 keg rotating brew setup, fermentation & dispenser fridges.
Re: The simple 4" bubbler
![]() by Jonno » Mon Jun 17, 2013 3:23 pm
by Jonno » Mon Jun 17, 2013 3:23 pm
Did lots of banging and swearing today. Not so much a productive day but did learn alot about different bits and bobs.
I learned i do have enough heat to make easy flanges. I also learnt that try not to squeeze the rings tight as that play it has is good for after you've banged them flat to make them fit over the 4" or 2" :laughing-rolling:
I also learnt that to make these plates are gonna be a long process lol, i cut the one i did make up today to small. Buts its all good, was real distracted with the nba finals today. So didn't get as much as i thought i would but that's alright. Actually i didn't get a whole lot of a lot done today :laughing-rolling: But did learnt alot which is awesome :handgestures-thumbupleft:
Anyone used stainless plates in there bubblers before? I'm just thinking because i know i can get stainless plates milled to size at work easily and i suppose its just the drilling of all the holes but what about for rc/pc plates? Anyone have any experience there??
Cheers lads!
- Jonno
Re: The simple 4" bubbler
![]() by blond.chap » Mon Jun 17, 2013 3:26 pm
by blond.chap » Mon Jun 17, 2013 3:26 pm
Jonno wrote:Anyone used stainless plates in there bubblers before? I'm just thinking because i know i can get stainless plates milled to size at work easily and i suppose its just the drilling of all the holes but what about for rc/pc plates? Anyone have any experience there??
Cheers lads!
Stainless plates would be fine, although drilling them would be a bitch without specialist equipment. I'm also not a fan of soldering stainless to copper, but if you have that skill go for it.
- blond.chap
- Posts: 877
- Images: 0
- Joined: Tue Aug 07, 2012 12:11 pm
- Location: South Australia
- equipment: Paris Stillton (4" perforated bubbler)
Re: The simple 4" bubbler
![]() by tickle » Mon Jun 17, 2013 8:49 pm
by tickle » Mon Jun 17, 2013 8:49 pm
[quote="Jonno"]Did lots of banging and swearing today. Not so much a productive day but did learn alot about different bits and bobs.
I learned i do have enough heat to make easy flanges. I also learnt that try not to squeeze the rings tight as that play it has is good for after you've banged them flat to make them fit over the 4" or 2" :laughing-rolling:
I also learnt that to make these plates are gonna be a long process lol, i cut the one i did make up today to small. Buts its all good, was real distracted with the nba finals today. So didn't get as much as i thought i would but that's alright. Actually i didn't get a whole lot of a lot done today :laughing-rolling: But did learnt alot which is awesome :handgestures-thumbupleft
Um...banging and swaering IS productive.....sometimes I do nothing but practice my banging and swearing, trying to up my game. :))
Couple o things on the plates getting too small; if you use a tubing cutter on the column, make sure you grind off the little lip that is created on the inside
:obscene-birdiedoublered: Mac helped me once by offering that you can pound the edges with a hammer and get quite a bit back as well. An finally, I often make an "internal" easy ring. Make a ring, ala easy flange method, but size it to fit tight INSIDE the column. Soldered to the plates it is super snug, and creates a bit of a weir wall. Its also a good method of attaching plates if the are going to be soldered to the column.
- tickle
- Posts: 201
- Joined: Sat Jul 28, 2012 1:11 am
- Location: Boston,Ma, usa
- equipment: 4" 4 plated bubble cap,
19 posts
• Page 1 of 1
Return to Plated Column Stills
Who is online
Users browsing this forum: oddian and 34 guests