
 5 Star Store
 Community Guidelines
 Newbies Corner
 Recipes
 AD search
Bryan's Bubbler Build
Re: Bryan's Bubbler Build
![]() by MacStill » Tue Jun 24, 2014 7:34 pm
by MacStill » Tue Jun 24, 2014 7:34 pm
- MacStill
- Lifetime Member
- Posts: 16835
- Joined: Fri Mar 18, 2011 1:40 pm
- Location: Wide Bay QLD
- equipment: Anything I choose :P
Re: Bryan's Bubbler Build
![]() by SBB » Tue Jun 24, 2014 7:46 pm
by SBB » Tue Jun 24, 2014 7:46 pm
Yummyrum wrote:..but on a Gas fired boiler , the extreme temps would fry any gaskets including teflon.
Just throwing this out there, Provided the drain pipe is full of liquid, how much hotter than the liquid inside of it can it get ?? I would think not a lot.
Have you ever tried boiling water in a paper cup on a camp fire, yes it is possible.
- SBB
- Lifetime Member
- Posts: 2450
- Joined: Mon Mar 21, 2011 8:12 pm
- Location: Northern NSW
- equipment: (The Pelican) a 2 inch pot / stripper on 25L electric boiler interchangable with T500 reflux still...... 2 1/2 inch pot still on 50L keg (gas burner).....
3 inch Boka (half share with Draino),...... 4 inch 4 plate perforated plate Bubbler
Re: Bryan's Bubbler Build
![]() by Zak Griffin » Tue Jun 24, 2014 7:47 pm
by Zak Griffin » Tue Jun 24, 2014 7:47 pm
I do believe that there are guys here running a conventional ball valve drain with gas :handgestures-thumbupleft:
- Zak Griffin
- Lifetime Member
- Posts: 6832
- Joined: Mon Jul 15, 2013 9:34 pm
- Location: Radelaide
- equipment: "The Heart of Gold" - 4" Bubbler - finally bubbling!
"Zaphod" - 3" Pot - retired
"Agrajag" - 6" Bubbler - midlife crisis build?
Re: Bryan's Bubbler Build
![]() by RuddyCrazy » Tue Jun 24, 2014 8:25 pm
by RuddyCrazy » Tue Jun 24, 2014 8:25 pm
Just trudged up the hill in the rain to take a couple of pic's so this is the basic layout
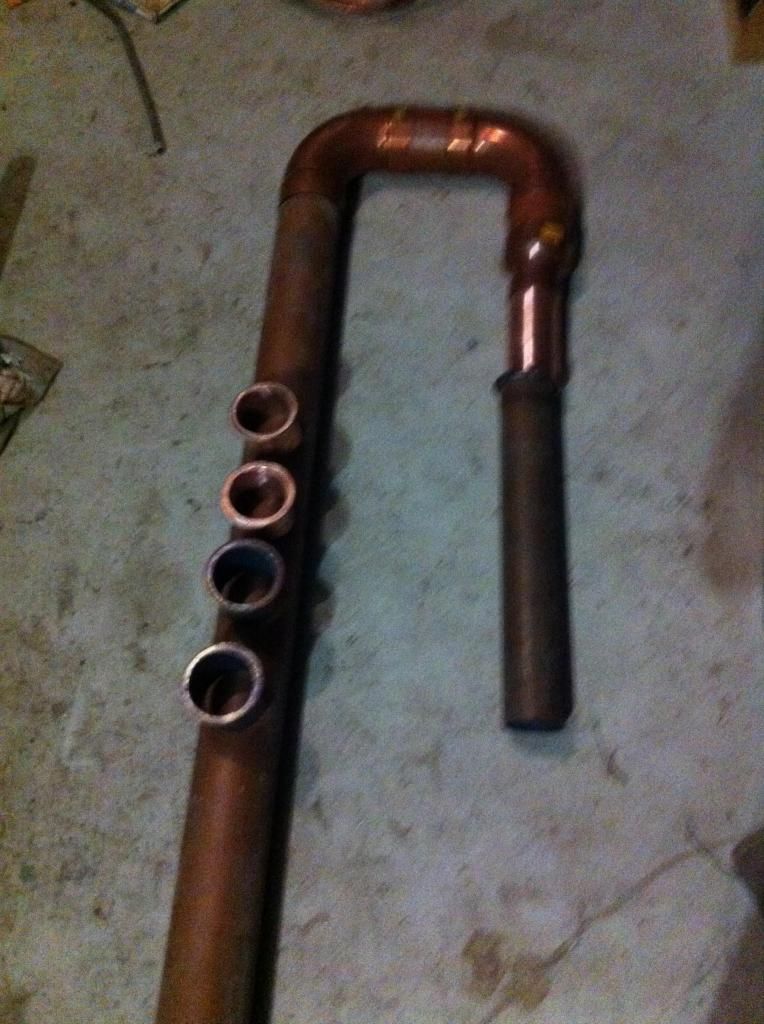
The main 4" upright tube hasn't been cut as yet and the RC, packed section is still yet to be made. On the right the shiny piece isn't in the 3" connector so it will be 40mm shorter. The tube below the shiny piece is the start of athe 3"x500mm PC shotgun.
The next pic is of the top section still all in bits as all part will need a citric acid bath before putting together to ensure the ID is totally clean
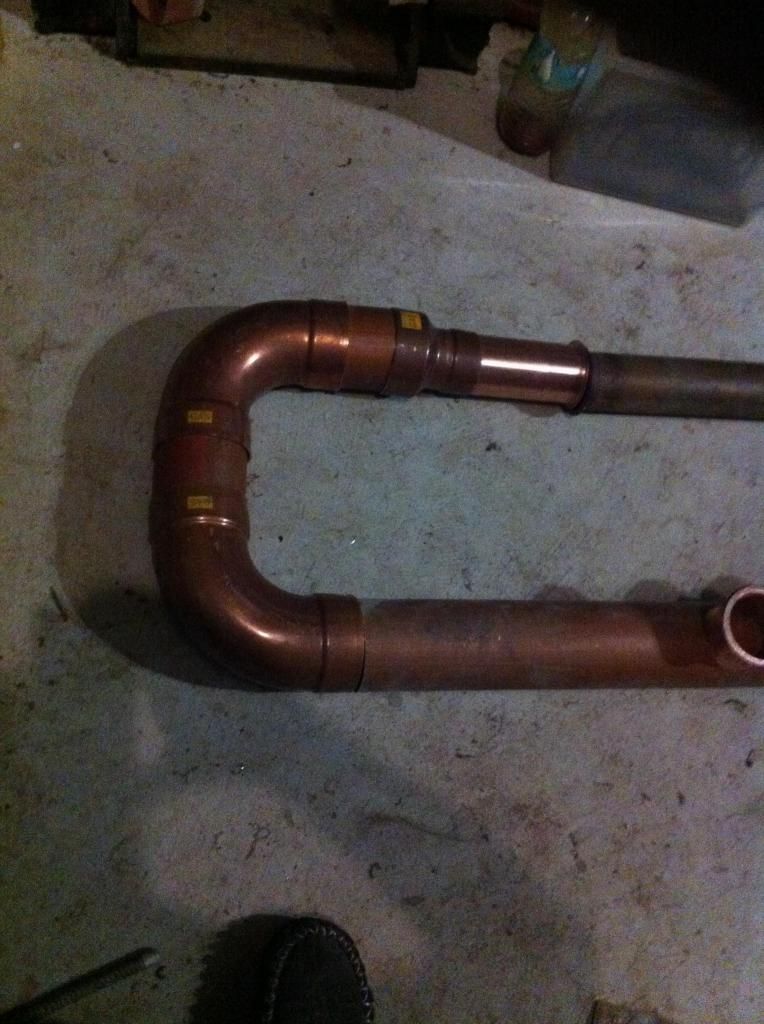
Main goal tomorrow is getting the PC and RC done, going into town to get some citric acid as swmbo forgot it today. Then onto the main column which will go into the bridgeport mill to bore the 4 holes for the site glass mounts
Cheers Bryan
- RuddyCrazy
- Mentor
- Posts: 2449
- Joined: Thu Oct 31, 2013 6:36 pm
- Location: Not far from Kanmantoo SA
- equipment: 4" copper bubbler with a setup for Neutral and a thumper for Whisky and my old 5 litre pot for doing maceration runs and MiniMe the baby pot still
Re: Bryan's Bubbler Build
![]() by pulsetech » Tue Jun 24, 2014 8:34 pm
by pulsetech » Tue Jun 24, 2014 8:34 pm
- pulsetech
- Posts: 425
- Joined: Sun May 11, 2014 1:40 pm
- equipment: 4"
Re: Bryan's Bubbler Build
![]() by Sam. » Tue Jun 24, 2014 8:36 pm
by Sam. » Tue Jun 24, 2014 8:36 pm
SBB wrote:Yummyrum wrote:..but on a Gas fired boiler , the extreme temps would fry any gaskets including teflon.
Just throwing this out there, Provided the drain pipe is full of liquid, how much hotter that the liquid inside of it can it get ?? I would think not a lot.
Have you ever tried boiling water in a paper cup on a camp fire, yes it is possible.
I have had the whole bottom part of kegs glowing red from the heat of a burner and all the ball valves are fine, the teflon tape sticking out from the threads onto the nipple haven't even melted ;-)
I know there is an awesome pic on here somewhere of it but good luck finding it :teasing-neener:
- Sam.
- Lifetime Member
- Posts: 10405
- Joined: Sun Jul 17, 2011 7:19 pm
- Location: South Oz Straya
- equipment: Original FSD 5 plate 4 inch modular bubbler SSG with hand crafted plates and parrot by Mac.
18 Gal boiler.
2 x 2400W elements and power controller.
.
Re: Bryan's Bubbler Build
![]() by MacStill » Tue Jun 24, 2014 8:40 pm
by MacStill » Tue Jun 24, 2014 8:40 pm
I'd say glowing red might be a problem tho :))
- MacStill
- Lifetime Member
- Posts: 16835
- Joined: Fri Mar 18, 2011 1:40 pm
- Location: Wide Bay QLD
- equipment: Anything I choose :P
Re: Bryan's Bubbler Build
![]() by SBB » Tue Jun 24, 2014 8:41 pm
by SBB » Tue Jun 24, 2014 8:41 pm
- SBB
- Lifetime Member
- Posts: 2450
- Joined: Mon Mar 21, 2011 8:12 pm
- Location: Northern NSW
- equipment: (The Pelican) a 2 inch pot / stripper on 25L electric boiler interchangable with T500 reflux still...... 2 1/2 inch pot still on 50L keg (gas burner).....
3 inch Boka (half share with Draino),...... 4 inch 4 plate perforated plate Bubbler
Re: Bryan's Bubbler Build
![]() by pulsetech » Tue Jun 24, 2014 8:44 pm
by pulsetech » Tue Jun 24, 2014 8:44 pm
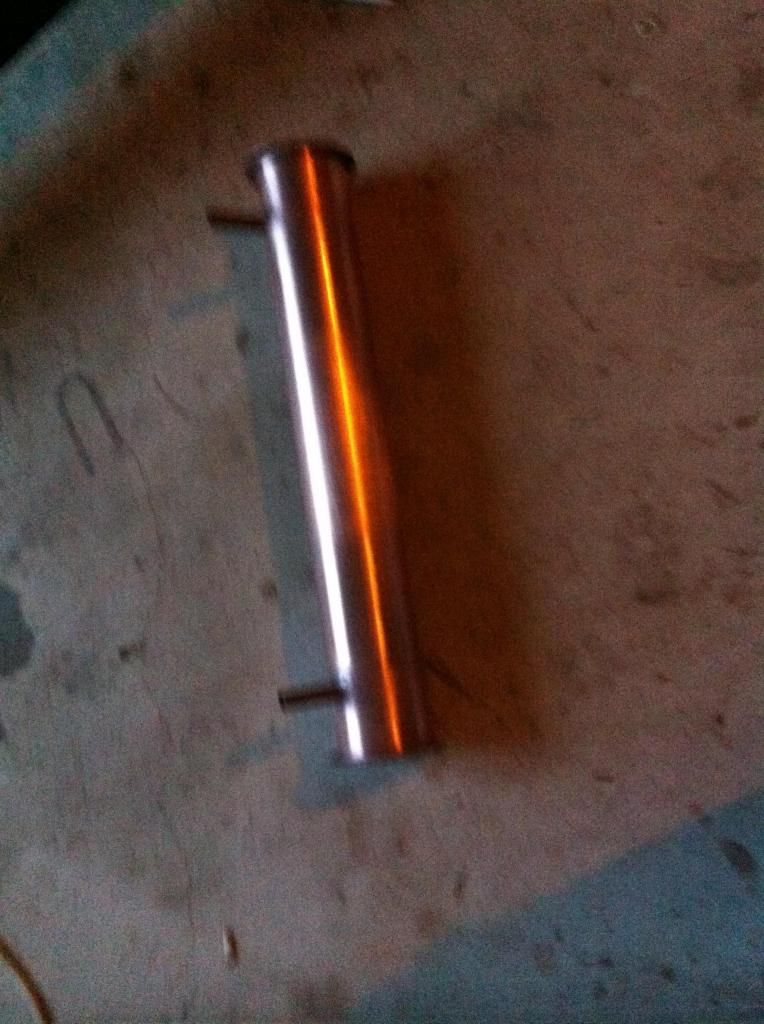
Temperature [°C]
Black red (when viewed in dull light) 426 to 593
Very dark red 593 to 704
Dark red 704 to 814
Cherry red (lower critical point) 815 to 870 (critical point depends on carbon content of steel)
Light cherry red 871 to 981
Orange 981 to 1092
Yellow 1093 to 1258
Yellow white 1259 to 1314
White 1315+
- pulsetech
- Posts: 425
- Joined: Sun May 11, 2014 1:40 pm
- equipment: 4"
Re: Bryan's Bubbler Build
![]() by RuddyCrazy » Tue Jun 24, 2014 8:47 pm
by RuddyCrazy » Tue Jun 24, 2014 8:47 pm
pulsetech wrote:How do you plan to Hold the Pipe in your mill. I have an X Guide but copper is so soft
easy machine up some bungs to 98mm OD and insert them where the clamps will go......
- RuddyCrazy
- Mentor
- Posts: 2449
- Joined: Thu Oct 31, 2013 6:36 pm
- Location: Not far from Kanmantoo SA
- equipment: 4" copper bubbler with a setup for Neutral and a thumper for Whisky and my old 5 litre pot for doing maceration runs and MiniMe the baby pot still
Re: Bryan's Bubbler Build
![]() by pulsetech » Tue Jun 24, 2014 8:52 pm
by pulsetech » Tue Jun 24, 2014 8:52 pm
Bryan1 wrote:pulsetech wrote:How do you plan to Hold the Pipe in your mill. I have an X Guide but copper is so soft
easy machine up some bungs to 98mm OD and insert them where the clamps will go......
:handgestures-thumbupleft:
- pulsetech
- Posts: 425
- Joined: Sun May 11, 2014 1:40 pm
- equipment: 4"
Re: Bryan's Bubbler Build
![]() by Yummyrum » Tue Jun 24, 2014 9:01 pm
by Yummyrum » Tue Jun 24, 2014 9:01 pm
Bryan1 wrote:OK Guy's,
Just trudged up the hill in the rain to take a couple of pic's so this is the basic layout
Cheers Bryan
Thanks Bryan ..trooper .
Re: the drain comments , fair enough guys ,I was only thinking of heat transfer through a tri- clamp one end will be red hot ...the other as SBB correctly points out at boiling point ....in between a gasket .
I have seen what direct heat to teflon tape does and was basing my comment on this ...it being the highest temp rated gasket material AFAIK....Sorry Bryan
- Yummyrum
- Posts: 1897
- Joined: Fri Dec 28, 2012 3:19 pm
- Location: Near Coffs
- equipment: Did use Still Spirits Reflux
Now use 50l Keg with Pot head for Rum and Neutral stripping runs on gas .
LM/VM head with 1m packed 2" on Still Spirits boiler for Neutrals.
Re: Bryan's Bubbler Build
![]() by RuddyCrazy » Tue Jun 24, 2014 9:15 pm
by RuddyCrazy » Tue Jun 24, 2014 9:15 pm
- RuddyCrazy
- Mentor
- Posts: 2449
- Joined: Thu Oct 31, 2013 6:36 pm
- Location: Not far from Kanmantoo SA
- equipment: 4" copper bubbler with a setup for Neutral and a thumper for Whisky and my old 5 litre pot for doing maceration runs and MiniMe the baby pot still
Re: Bryan's Bubbler Build
![]() by Sam. » Tue Jun 24, 2014 9:23 pm
by Sam. » Tue Jun 24, 2014 9:23 pm
- Sam.
- Lifetime Member
- Posts: 10405
- Joined: Sun Jul 17, 2011 7:19 pm
- Location: South Oz Straya
- equipment: Original FSD 5 plate 4 inch modular bubbler SSG with hand crafted plates and parrot by Mac.
18 Gal boiler.
2 x 2400W elements and power controller.
.
Re: Bryan's Bubbler Build
![]() by RuddyCrazy » Tue Jun 24, 2014 9:53 pm
by RuddyCrazy » Tue Jun 24, 2014 9:53 pm
I do like to think out of the box and this being my first real major challenge making a 2 way still does sound the go afterall got a heap of copper here and know where to get more even cheaper.
Out of beer and now sipping strawberry/ UJ liquor
- RuddyCrazy
- Mentor
- Posts: 2449
- Joined: Thu Oct 31, 2013 6:36 pm
- Location: Not far from Kanmantoo SA
- equipment: 4" copper bubbler with a setup for Neutral and a thumper for Whisky and my old 5 litre pot for doing maceration runs and MiniMe the baby pot still
Re: Bryan's Bubbler Build
![]() by RuddyCrazy » Tue Jul 01, 2014 9:17 pm
by RuddyCrazy » Tue Jul 01, 2014 9:17 pm
A bit more progress today, Got the first plate done to size and drill for the PC. 5 off 1/2" copper for the vapour. Also started on the RC and got the first easy flange done and soft soldered, now I did find 4" is so much easier to hammer over than 3" which I'm glad is is all done. Now with 4" seeming so esy to hammer I am now thinking of going a modular design and hang the expense of a few extra tri clover clamps :)) :)) :))
On sunday my mates came around and I asked them about a SS 2 to 4" adaptor as I have the flanges here already. My mate said no worries and handed back my flanges and said i'll have next weekend for you and also that 3 to 3/4" SS reducer. He's also gonig to try and find some tri clover clamps for me too.
Got a few of the parts sitting in citric acid over night and hopefully tomorrow they will be nice and clean and ready to solder together.
Now I did buy some perf plates off Mac and being 107mm diameter looks like they made for a modular design, now with an easy flange each side and the perf plate in the middle along with 2 gaskets would that make it too wide for the tri clover clamp ?????
Cheers Bryan
- RuddyCrazy
- Mentor
- Posts: 2449
- Joined: Thu Oct 31, 2013 6:36 pm
- Location: Not far from Kanmantoo SA
- equipment: 4" copper bubbler with a setup for Neutral and a thumper for Whisky and my old 5 litre pot for doing maceration runs and MiniMe the baby pot still
Re: Bryan's Bubbler Build
![]() by MacStill » Tue Jul 01, 2014 9:46 pm
by MacStill » Tue Jul 01, 2014 9:46 pm
You can see the plate takes the space where the inner part of our custom seals has been removed.
- MacStill
- Lifetime Member
- Posts: 16835
- Joined: Fri Mar 18, 2011 1:40 pm
- Location: Wide Bay QLD
- equipment: Anything I choose :P
Re: Bryan's Bubbler Build
![]() by RuddyCrazy » Tue Jul 01, 2014 9:51 pm
by RuddyCrazy » Tue Jul 01, 2014 9:51 pm
On thinking what I may have to do is machine the OD down to 98mm so it's a neat fit in the 4" tube then cut the 4" say 1/2" long cut slit it it then solder it in just below the easy flange. That way the perf plate will have a solid seat and be easily removed for cleaning or taking out depending on the run.
Cheers Bryan
- RuddyCrazy
- Mentor
- Posts: 2449
- Joined: Thu Oct 31, 2013 6:36 pm
- Location: Not far from Kanmantoo SA
- equipment: 4" copper bubbler with a setup for Neutral and a thumper for Whisky and my old 5 litre pot for doing maceration runs and MiniMe the baby pot still
Re: Bryan's Bubbler Build
![]() by RuddyCrazy » Wed Jul 16, 2014 6:19 pm
by RuddyCrazy » Wed Jul 16, 2014 6:19 pm
Got a tad more done on the still today and made the PC, 3" X 500mm long with 5 off 1/2" pipes in the guts.
Here's a pic of one end and still need file the mating face fully flat and nearly there with it.
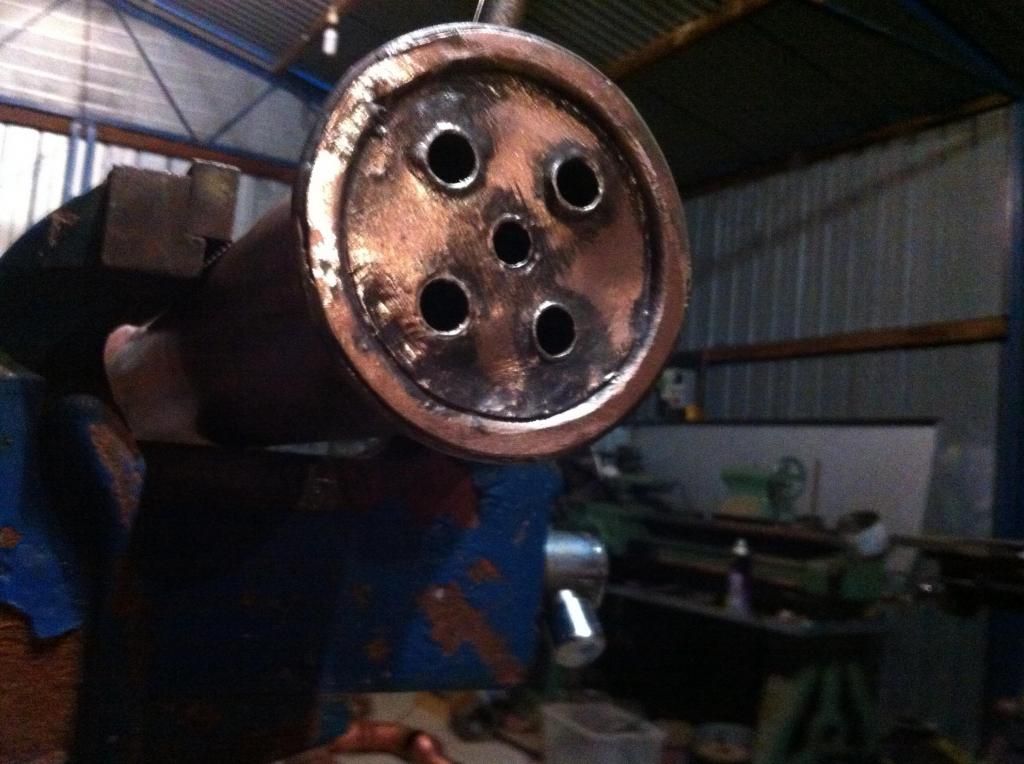
Final pic of the shotgun
Cheers Bryan
- RuddyCrazy
- Mentor
- Posts: 2449
- Joined: Thu Oct 31, 2013 6:36 pm
- Location: Not far from Kanmantoo SA
- equipment: 4" copper bubbler with a setup for Neutral and a thumper for Whisky and my old 5 litre pot for doing maceration runs and MiniMe the baby pot still
Re: Bryan's Bubbler Build
![]() by TheMechwarrior » Wed Jul 16, 2014 6:23 pm
by TheMechwarrior » Wed Jul 16, 2014 6:23 pm
It's normal practice to install baffles on the water side of your shell and tube heat exchanger to improve performance, however I do like your twisted tube approach. Shame you couldn't show it off with a clear shell :-D
Great stuff, keep the copper pics coming.
- TheMechwarrior
- Posts: 1007
- Joined: Mon Dec 05, 2011 1:43 pm
- Location: Tasmania
- equipment: Five Star Distilling 6" neutraliser with
100L boiler
Return to Plated Column Stills
Who is online
Users browsing this forum: No registered users and 80 guests