
 5 Star Store
 Community Guidelines
 Newbies Corner
 Recipes
 AD search
Well give us a squizz then!!
:teasing-tease:
pot still design
79 posts
• Page 3 of 4 • 1, 2, 3, 4
Re: pot still design
![]() by Camikaze » Sat Oct 13, 2012 10:43 am
by Camikaze » Sat Oct 13, 2012 10:43 am
- Camikaze
- Posts: 777
- Joined: Fri Jul 27, 2012 5:48 pm
- Location: Medowie, NSW
- equipment: The 'Lamb-cannon' 4" stainless modular hybrid on a keg, shottie-cooled with 185,000 btu up its arse
Re: pot still design
![]() by kelbygreen » Sat Oct 13, 2012 11:14 am
by kelbygreen » Sat Oct 13, 2012 11:14 am
ignore all the old solder above it that I have melted and sanded off many times haha
- kelbygreen
- Posts: 191
- Joined: Sat Sep 22, 2012 4:19 pm
- Location: Newcastle
- equipment: 3" pot
Re: pot still design
![]() by Camikaze » Sat Oct 13, 2012 12:48 pm
by Camikaze » Sat Oct 13, 2012 12:48 pm
Looks the goods mate.
When the solder has filled the joint, quickly wipe it over with a rag. It'll save heaps of filing and sanding afterwards.
Good job mate. :handgestures-thumbupleft:
When the solder has filled the joint, quickly wipe it over with a rag. It'll save heaps of filing and sanding afterwards.
Good job mate. :handgestures-thumbupleft:
- Camikaze
- Posts: 777
- Joined: Fri Jul 27, 2012 5:48 pm
- Location: Medowie, NSW
- equipment: The 'Lamb-cannon' 4" stainless modular hybrid on a keg, shottie-cooled with 185,000 btu up its arse
Re: pot still design
![]() by Linno » Sat Oct 13, 2012 12:49 pm
by Linno » Sat Oct 13, 2012 12:49 pm
looks like you are gettng there mate... :handgestures-thumbupleft:
- Linno
- Posts: 314
- Joined: Sun May 13, 2012 3:20 pm
- Location: Perth SoR
- equipment: FSD Mac 4 version 1 #001
4" single cap, 4 plate SS Bubbler,
400mm SS packed extension
Re: pot still design
![]() by kelbygreen » Sat Oct 13, 2012 2:05 pm
by kelbygreen » Sat Oct 13, 2012 2:05 pm
yeah cheers for the info I did try that once but it wiped it all back out, Will give it another go though for sure.
just ordered the gear from the AC/DC so just gotto get the plumbing fittings and get to building :D
just ordered the gear from the AC/DC so just gotto get the plumbing fittings and get to building :D
- kelbygreen
- Posts: 191
- Joined: Sat Sep 22, 2012 4:19 pm
- Location: Newcastle
- equipment: 3" pot
Re: pot still design
![]() by Kimbo » Sat Oct 13, 2012 5:10 pm
by Kimbo » Sat Oct 13, 2012 5:10 pm
Dont stop him now,He's got momentum :handgestures-thumbupleft:
well done mate.
well done mate.
- Kimbo
- Lifetime Member
- Posts: 5461
- Images: 0
- Joined: Fri Mar 18, 2011 6:33 pm
- Location: Perf WA
- equipment: 4" bubbler with a 6"inline thumper
Re: pot still design
![]() by kelbygreen » Sat Oct 13, 2012 5:20 pm
by kelbygreen » Sat Oct 13, 2012 5:20 pm
you got that right lol here is the liebig I started to knock up out of the scrap bit of 1/2" I had, Didnt have a drill big enough so has the bur it out a bit but that was good as could get it nice and tight so it was flush on the inside :-D
- kelbygreen
- Posts: 191
- Joined: Sat Sep 22, 2012 4:19 pm
- Location: Newcastle
- equipment: 3" pot
Re: pot still design
![]() by Jonno » Sat Oct 13, 2012 5:47 pm
by Jonno » Sat Oct 13, 2012 5:47 pm
looking good man!! I ended up finding me some 2" pipe, 1" pipe and 3/4" pipe at work today. Gonna stop by tradelink during the week and pickup a 1" 45 bend and some t pieces for the liebig and i'm all good to go!!
- Jonno
Re: pot still design
![]() by kelbygreen » Sat Oct 13, 2012 5:56 pm
by kelbygreen » Sat Oct 13, 2012 5:56 pm
just gotto figure out how to solder on a hose connector I got 2 brass ones one with female thread and one with a male thread I screw into a ball valve but they are to big.
What are other people using?
What are other people using?
- kelbygreen
- Posts: 191
- Joined: Sat Sep 22, 2012 4:19 pm
- Location: Newcastle
- equipment: 3" pot
Re: pot still design
![]() by emptyglass » Sat Oct 13, 2012 9:12 pm
by emptyglass » Sat Oct 13, 2012 9:12 pm
You could use a brass weld bush (a fitting with a thread one end, and a hole to suit the tube in the other end) then screw the fittings you have on them.
I you have access to a lathe, you can modify all sorts of fittings to suit.
I you have access to a lathe, you can modify all sorts of fittings to suit.
- emptyglass
Re: pot still design
![]() by kelbygreen » Sat Oct 13, 2012 9:20 pm
by kelbygreen » Sat Oct 13, 2012 9:20 pm
I got a kinko nut type fitting that suits the pipe but it wont suit the brass tap fitting so I think I will ask at the co op when I get the fittings. worst case the hoses usually fit onto the 1/2" anyway with a hose clamp so that is a option as its only cooling water so wont matter
- kelbygreen
- Posts: 191
- Joined: Sat Sep 22, 2012 4:19 pm
- Location: Newcastle
- equipment: 3" pot
Re: pot still design
![]() by Aussiedownunder01 » Sun Oct 14, 2012 1:21 am
by Aussiedownunder01 » Sun Oct 14, 2012 1:21 am
I just used a brass hose joiner cut in 1/2 and drilled to suit the pipe i am using and solder it on
You do not have the required permissions to view the files attached to this post.
- Aussiedownunder01
- Posts: 1133
- Joined: Tue Sep 11, 2012 7:25 am
- Location: So close to melbourne airport you can hear the plains
- equipment: 100 litre boiler with a 4 in 5 plate bubbler on top with a 500 packed section standing by if needed
Re: pot still design
![]() by kelbygreen » Mon Oct 15, 2012 6:58 pm
by kelbygreen » Mon Oct 15, 2012 6:58 pm
cheers ADU,
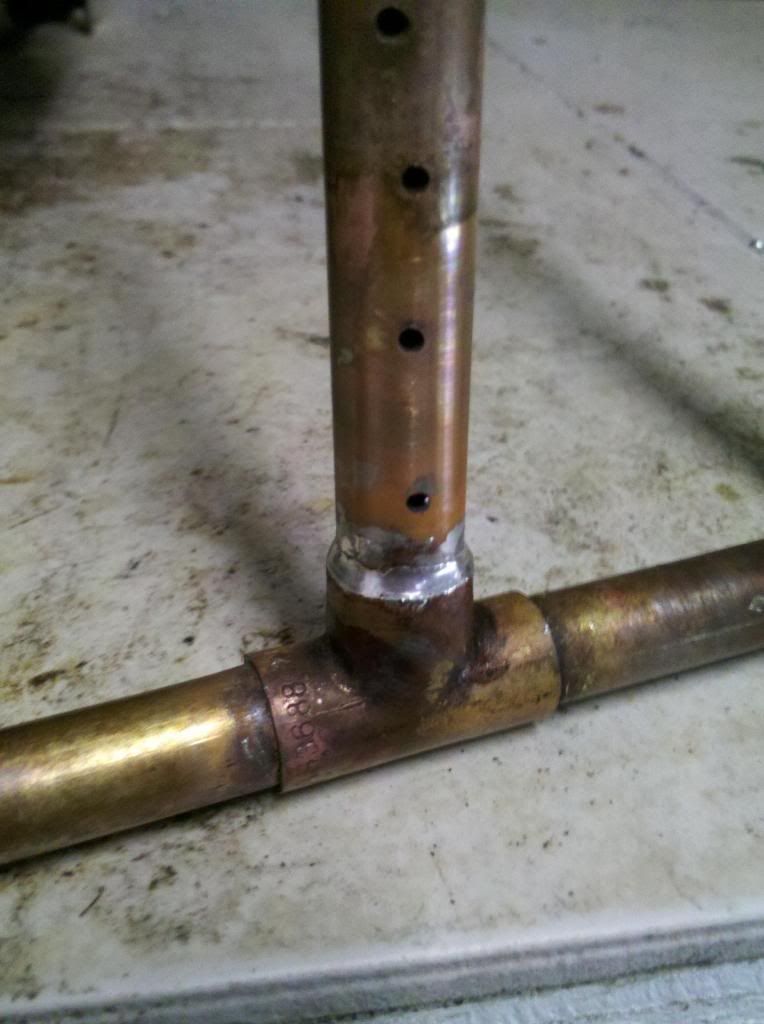
Got the best of me on the way home and I couldnt make it to the plumbing co op before it closed so stopped into reece and got some fittings for the liebag, I think the outer pipe is not 1" as the fitting I got (or asked for) was meant to be 1" to 3/4 reducer but it slide into the inside of the pipe with 1mm gap right around. It took up a heap of solder but it filled the holes well and passed the leak test :handgestures-thumbupleft:
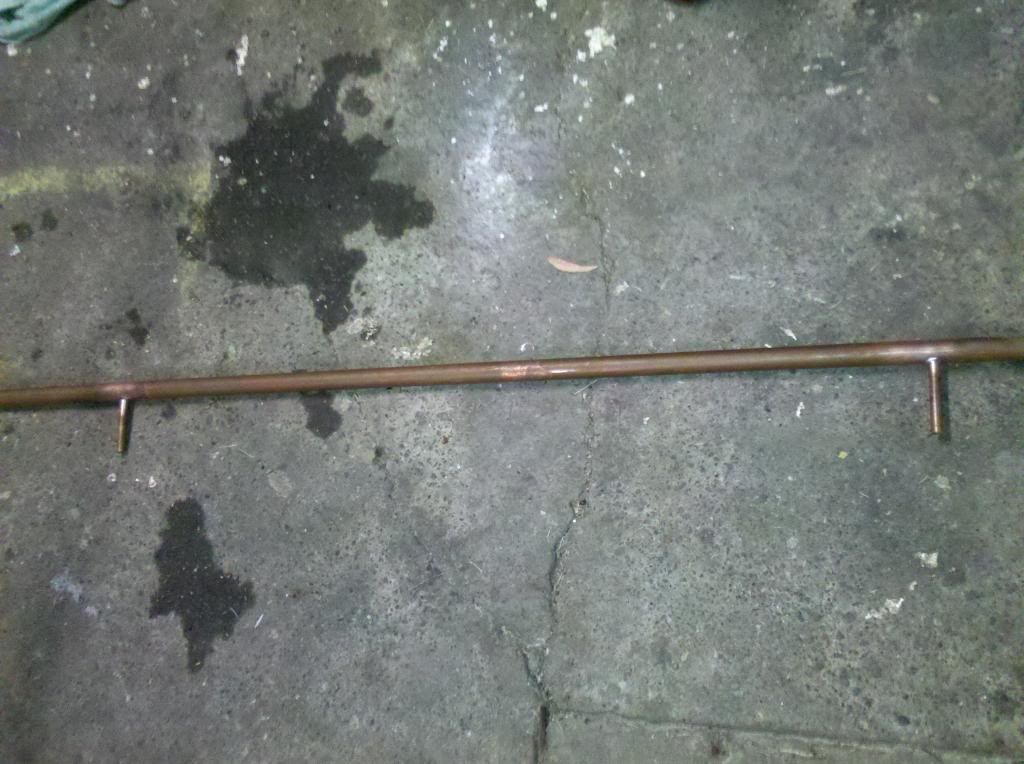
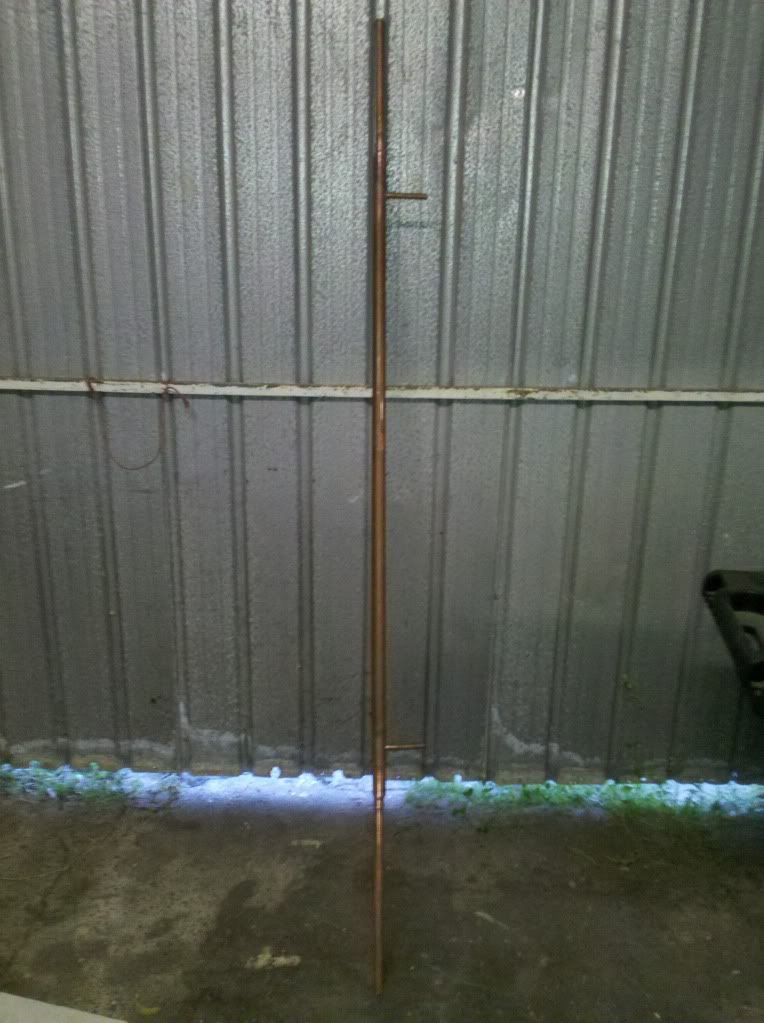
big enough liebig? about 2m overall should get me away from the burner :D .
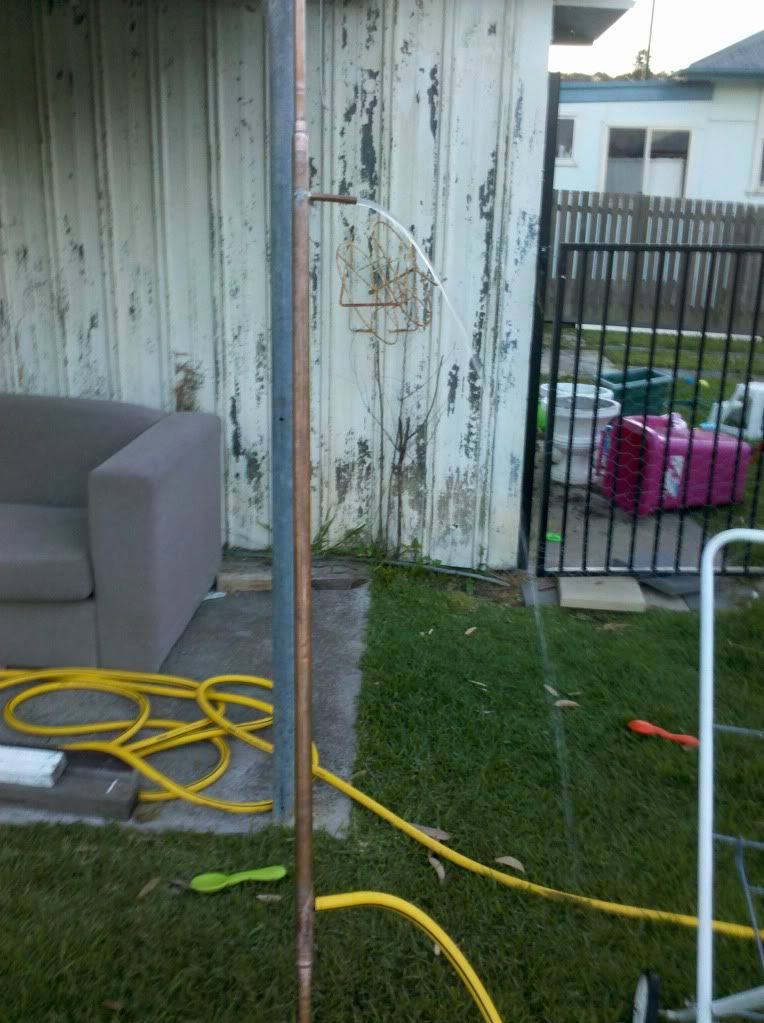
water flowing threw the liebig, no leaks when I plugged it. Dont look at the yard got a 2.5 year old and you would be amazed where I find my boots in the morning lol
Well I couldnt find my rat tail file and dont have a dremel and sanding by hand was not working. So this little ghetto tool sanded the stopper out of the reducers :roll: Its a piece of 1/2" copper with sandpaper duct taped to it. Took about 5 mins per fitting rather then 2 hrs by hand.
Got the best of me on the way home and I couldnt make it to the plumbing co op before it closed so stopped into reece and got some fittings for the liebag, I think the outer pipe is not 1" as the fitting I got (or asked for) was meant to be 1" to 3/4 reducer but it slide into the inside of the pipe with 1mm gap right around. It took up a heap of solder but it filled the holes well and passed the leak test :handgestures-thumbupleft:
big enough liebig? about 2m overall should get me away from the burner :D .
water flowing threw the liebig, no leaks when I plugged it. Dont look at the yard got a 2.5 year old and you would be amazed where I find my boots in the morning lol
Well I couldnt find my rat tail file and dont have a dremel and sanding by hand was not working. So this little ghetto tool sanded the stopper out of the reducers :roll: Its a piece of 1/2" copper with sandpaper duct taped to it. Took about 5 mins per fitting rather then 2 hrs by hand.
- kelbygreen
- Posts: 191
- Joined: Sat Sep 22, 2012 4:19 pm
- Location: Newcastle
- equipment: 3" pot
Re: pot still design
![]() by Kimbo » Mon Oct 15, 2012 8:22 pm
by Kimbo » Mon Oct 15, 2012 8:22 pm
Lookin good Kelby :handgestures-thumbupleft:
Nice Pink fermenter too BTW ;-)
Nice Pink fermenter too BTW ;-)
- Kimbo
- Lifetime Member
- Posts: 5461
- Images: 0
- Joined: Fri Mar 18, 2011 6:33 pm
- Location: Perf WA
- equipment: 4" bubbler with a 6"inline thumper
Re: pot still design
![]() by kelbygreen » Mon Oct 15, 2012 8:42 pm
by kelbygreen » Mon Oct 15, 2012 8:42 pm
cheers they might be my cooling water containers got like 3 empty ATM lol. Daughter just puts crap in them and wheels them around the yard.
Edit: Oh now the 1/2" pipe is stuck in the drill will deal with that at work with some multi grips. Looks like it squashed the pipe and the teeth wont let go :angry-banghead:
Edit: Oh now the 1/2" pipe is stuck in the drill will deal with that at work with some multi grips. Looks like it squashed the pipe and the teeth wont let go :angry-banghead:
- kelbygreen
- Posts: 191
- Joined: Sat Sep 22, 2012 4:19 pm
- Location: Newcastle
- equipment: 3" pot
Re: pot still design
![]() by kelbygreen » Thu Oct 18, 2012 7:26 pm
by kelbygreen » Thu Oct 18, 2012 7:26 pm
ok bit of a update. Got some fittings today, so the only logical thing to do this arvo is this!
Got the keg organized to have the 3" ferrule welded in tomorrow morning and might be able to get a vinegar run out of it tomorrow or on the weekend :handgestures-thumbupleft:
Got the keg organized to have the 3" ferrule welded in tomorrow morning and might be able to get a vinegar run out of it tomorrow or on the weekend :handgestures-thumbupleft:
- kelbygreen
- Posts: 191
- Joined: Sat Sep 22, 2012 4:19 pm
- Location: Newcastle
- equipment: 3" pot
Re: pot still design
![]() by MacStill » Thu Oct 18, 2012 9:04 pm
by MacStill » Thu Oct 18, 2012 9:04 pm
Good work KG, just needs a union so you can adjust your Liebig height but you can always do that anytime.
Now get the gas on :handgestures-thumbupleft:
Now get the gas on :handgestures-thumbupleft:
- MacStill
- Lifetime Member
- Posts: 16835
- Joined: Fri Mar 18, 2011 1:40 pm
- Location: Wide Bay QLD
- equipment: Anything I choose :P
Re: pot still design
![]() by kelbygreen » Thu Oct 18, 2012 9:35 pm
by kelbygreen » Thu Oct 18, 2012 9:35 pm
its in the post mac :P I made the lyme arm long enough to cut and add that in when I get it :D
- kelbygreen
- Posts: 191
- Joined: Sat Sep 22, 2012 4:19 pm
- Location: Newcastle
- equipment: 3" pot
Re: pot still design
![]() by crow » Fri Oct 19, 2012 9:58 am
by crow » Fri Oct 19, 2012 9:58 am
hey KG can I suggest that you get a right angled union and join it on the bend, it will be a pain in the ring to move ya whole still up and down to adjust your take off hight, just sayin
- crow
- Posts: 2363
- Joined: Tue Mar 13, 2012 1:44 am
- Location: Central Highlands Victoria
- equipment: ultra pure reflux still and a 4" 4 plate MacStill built copper bubble cap column and a 500mm scoria packed rectifying module
79 posts
• Page 3 of 4 • 1, 2, 3, 4
Who is online
Users browsing this forum: No registered users and 58 guests