5 Star Store
 Community Guidelines
 Newbies Corner
 Recipes
 AD search
unlike most here who want to go bigger in order to distil the near commercial quantities of booze that seem to be in fashion, i decided to section a keg instead of extend it. :teasing-neener:
*warning: looong post*
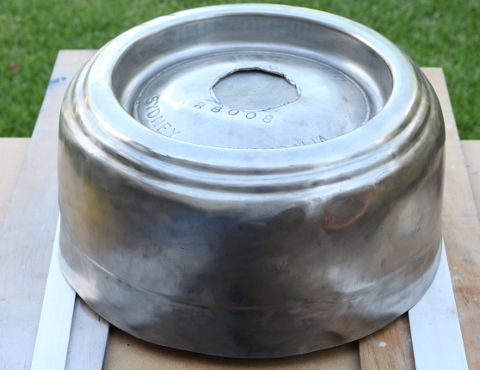
since i didn't want to spend a lot of money on a keg, i headed to my local scrap yard. unfortunately they only had a single 50ish l keg. it was a beat up old spear keg. i gave it a quick look over and the most beat up bit was the bit i was going to cut out. it was rusty, but i thought it was just surface rust. no worries. i was hoping for a more modern keg, but this was all they had and i didn't want to leave empty handed. went back a few weeks later for some copper plate and some other tube and could have cried... they had 5 decent (or seemingly decent) kegs. :crying-blue:
no pic of the keg in it's original form... didn't plan on doing a build thread originally. i cut the section out i figured would be about right, had a butchers inside, and threw some water into the bottom section to get an idea of volume, then cut some more off both top and bottom parts. the inside was in pretty good nick, but there was some rust associated with the welds. aside for a couple of spots it was surface rust i was able to remove.
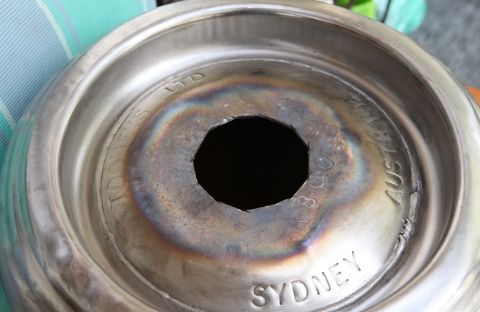
using a flap disk and maroon scouring pad i did a quick clean of the outside of the two sections, then focused on the top section. the top of the top was a bit of a pain because tooheys in their wisdom had decided to paint the top and bottom below the rim blue. by this stage i had some stainless steel wire brushes for the angle grinder so with some perseverance i manage to get it all back to bright metal.
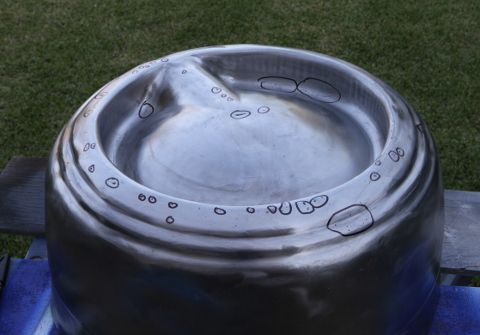
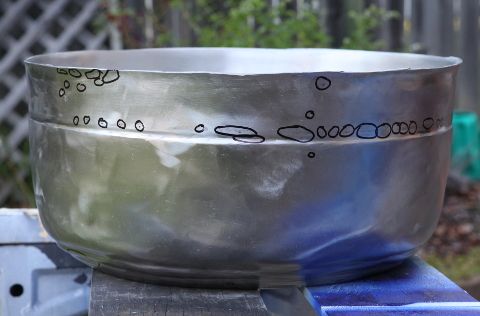
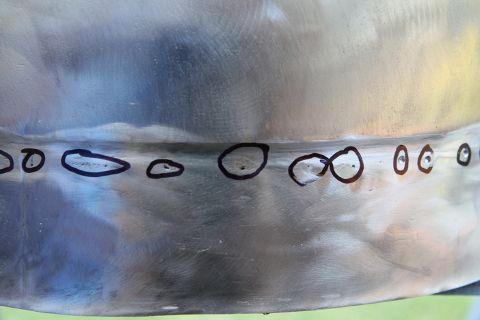
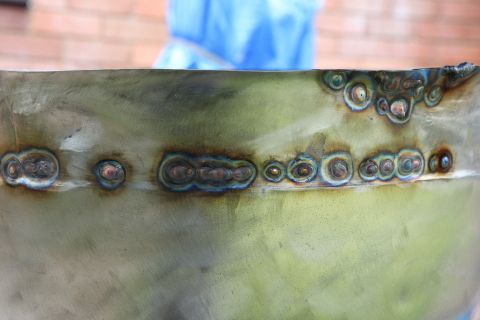
now for the fun bit. the surface rust was mostly surface rust, however, near the factory weld it was pitted, and i suspected those pits were cavities of rust. i circled them in black to it was easy to find them to grind out back to bright. below gives you an idea of how many spots i had to deal with, and a close up of some of the pits:

i drilled some of the spots, but mostly i used diamond and tungsten carbide bits on the dremel. i was expecting rust, instead what i found was cavities of chromium carbide. that explained the rust. old kegs are made from old stainless. as far as i know the keg is 304 stainless. modern 304 has less carbon content than it had in the past. when welds on stainless with that slightly higher carbon content cool slowly, pockets of chromium carbide are formed. this depletes the local aria of chrome making it vulnerable to rust. :-B
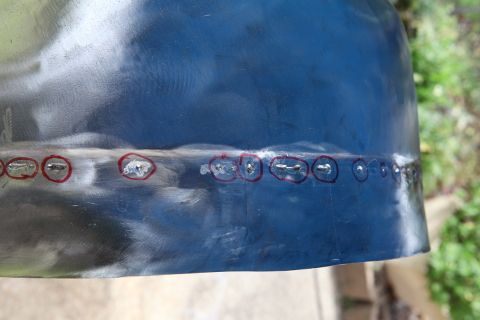
as bad material was removed the spot was circled in red to make it easy to keep track of and to show me where i needed to fill. i used a citric acid based paste on the newly ground metal to make sure any surface iron was removed and to help promote passivation of the surface.
there was one spot where after removing the bad metal on the vertical seam on the inside and a spot on the opposite side, i was left with a hole, so eventually this keg would have leaked. i'm using tig for the welding on this project. this is my setup:
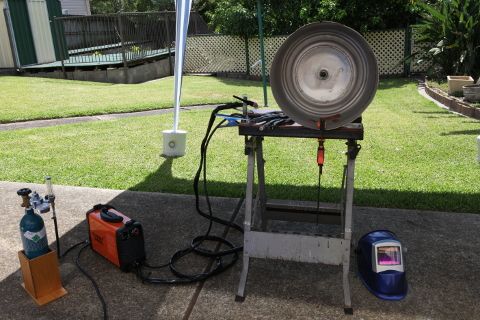
i went with tig because my brother offered to lend me his new machine. the wooden jaws of the workmate were replaced with some mild steel rectangular tube capped with copper sheet to minimise iron contamination of the stainless. originally i was going to use disposable argon cylinders, but after using one for something else and only getting 45mins out of it i had to re-think. a c sized cylinder has 3 times the capacity of a throw away, and at $50 a swap as opposed to $60-$70 for a throw away, the $215 initial layout passes itself with the first swap. to weld up a new keg with a few ferrules wouldn't take a massive amount of weld time, but between getting comfortable with the gear, making the starting material sound and other fabrication there is a lot of fafing around, so i'm using more gas that a standard keg to boiler build.
as the metal behind the bits to be filled would be fairly thin, i backed the aria to be filled with copper plate that i had annealed to conform to the curve of the keg:
i've read a number of posts claiming you don't need to purge, showing nice shiny welds after they have been abraded, but no shots of where it matters... the back side of the weld. more on that later in the post. in this case the copper helps both as a heat sink and to trap argon from the torch. here's the front side of some of the fill:
the brown halo on the right is what happens when you contaminate the tungsten with filler :shifty:
here's the back side:
in this case, no purge needed. :handgestures-thumbupleft: i will re-visit this topic later in the post :teasing-neener:
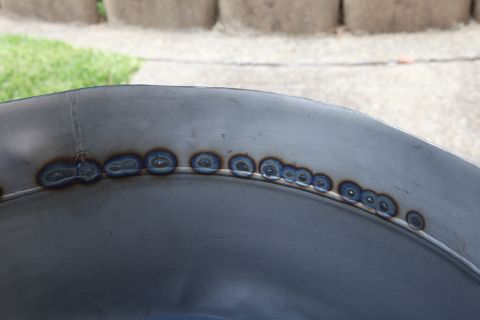
here's a section after the welds were levelled:
this also shows the half hole i had to build up. after flattening the welds on the inside i used some more of the citric acid based paste to aid in cleaning and passivating the inside of the keg. i wanted to try keeping the inside in as good a condition as possible to avoid problems later when it's all buttoned up. one thing we do have in our favour is that what we charge our boilers with is our friend with it's citric acid content.
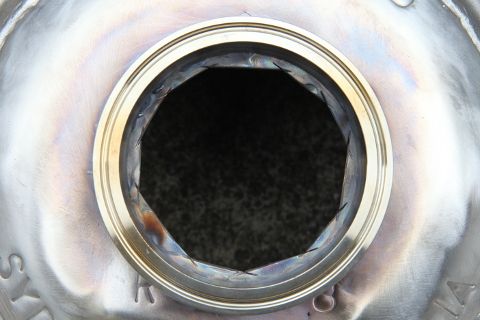
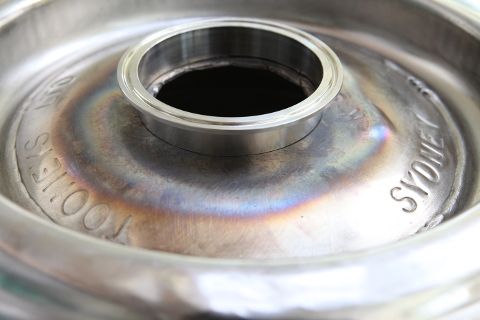
next on to the first hole, for the central 4 inch ferrule. i marked out the hole and initially i'd planned on drilling holes. i noticed in another post darwin award had used a dremel, so i thought i'd give it a go. it was taking a while so i gave up and went to one of the center punched marks i'd made earlier and started drilling with a cobalt drill. it was taking forever with a brand new bit, so i went back to the dremel. my dremel is old, so i had to stop after 1.5 to 2 cuts to let it cool down, but i got it done!

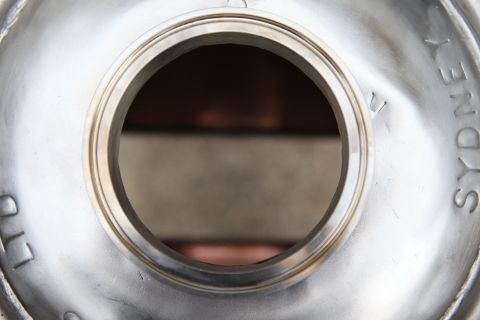
now for the next hurdle. the top wasn't what you would call flat...the threaded section for the spear was at an angle... this should give you an idea...
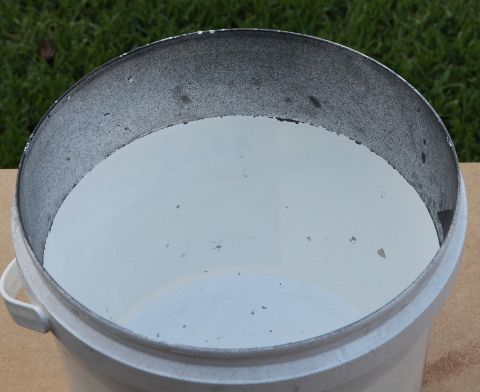
i had a chunk of aluminium hanging around that had been machined flat on both sides, so i figured that would made a good anvil, but it was way too short. i measured the hight of the inside of the keg to the top of the hole, took away the hight of the aluminium, filled up a levelled 5l bucket to this height with water and misted the bucket with black spray paint. when the water is poured out a nice line around the bucket at the height i want was left.:
this was filled with concrete to the line to give me something solid to put the "anvil" on:

i put the top of the keg over this setup :
erm yeh... i stuffed up my measurement and it was about 10mm too high, so i had to pack underneath.
originally i'd planned on heating up a 30mm wide ring around the hole to glowing and then hammer down over the hole with the end cap for the ferrule, but i couldn't get enough heat into it to keep the whole ring heated, so i had to heat up a bit at a time and bash it with a copper faced hammer. after working around the edge of the hole there was still a couple of low spots, so i turned the keg over and repeated on the now high spots. all in all it worked out well:
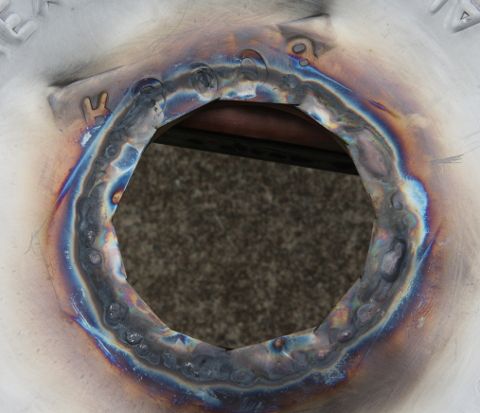
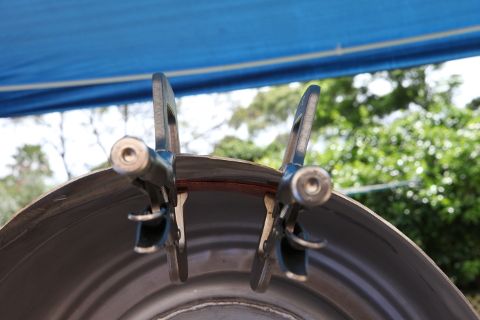
after a clean up with a stainless steel wire wheel i was ready to tack. remember i said i'd re-visit the purge gas topic again? well here it comes! :-p
here's a couple of tack welds:
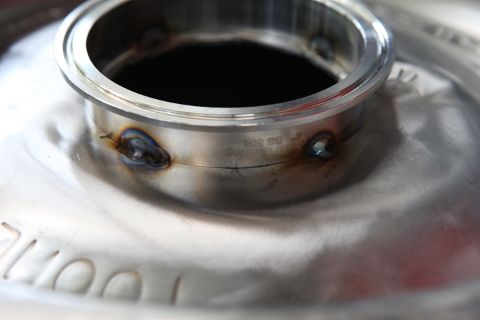
now here's the back side:
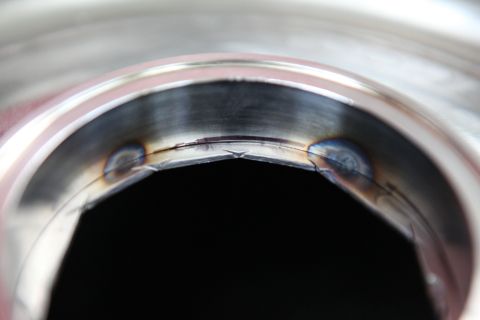
the one on the left hasn't penetrated through, so no problem. the one on the right shows the characteristics of oxides (sometimes called sugaring). here's another:

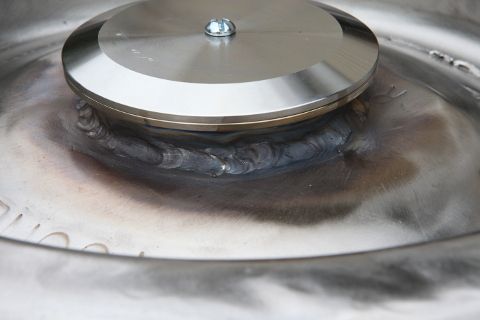
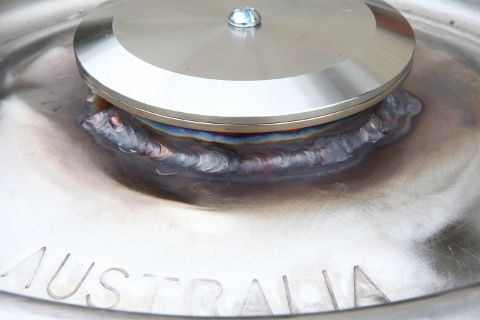
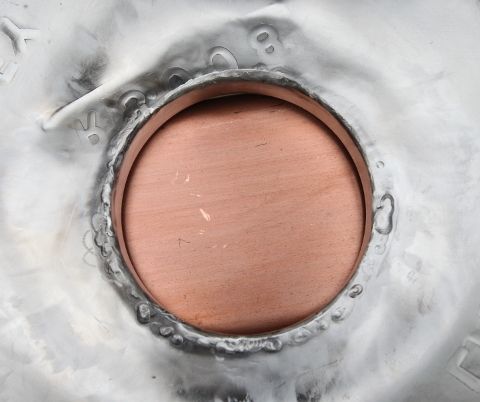
those areas like the places with chromium carbide, suffer a depletion of chrome. if that is left inside your keg that's just asking for it to eventually deteriorate. it has to be ground back, but just because it's shiny now doesn't mean it's not going to rust. mild steel gets shiny when you polish it too. ;-) if the chrome is gone, no amount of picking paste or other crap is going to magically put that chrome back. you just have to hope that the depleted area is isolated to the outside of the weld you are grinding away and what's underneath has enough chrome to passivate. in extreme cases the weld also becomes porous. i drilled a hole in the middle of the end cap and brazed some copper tube to some copper plate with a hole in it:

the plate gets bolted to the end cap from the underside and argon from a throw away tank (i had a couple hanging around) pumped into the cavity at a slow flow. if you don't have the luxury of having the keg cut up you could use something like solar flux or make a purge block to suit, but ultimately the back of the weld needs to be protected if it penetrates through. purging the entire keg is a bit excessive!
well that's where i'm up to so far. will post more when i progress some more.